It's quite possible to apply dry transfers to model kits, but generally waterslides are easier to apply & to adjust in case of problems. The instructions on this page are suitable not just for model kits, but for applying waterslides to other surfaces in need of decoration.
- On other pages:
- See also our page "Waterslide Transfers Applied to Drinking Glasses" (Plus Golly Transfers) →
- See also our page demonstrating "How to Apply Letraset Dry Rub-Down Transfers" →
- (If you are applying dry transfers to model kits, use the "pre-release" method discussed in Step Fifteen on the above page.)
STEP ONE: Select your transfer.
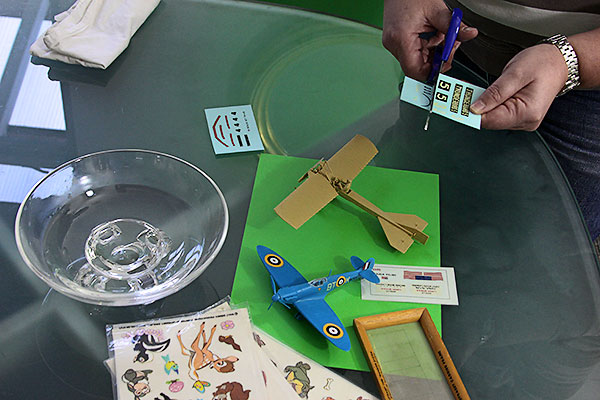
Carefully cut out your chosen transfer, leaving sufficient space around it to get a grip (see STEP FIVE).
N.B.: make sure you read through all these instructions before trying anything daft. And please wash your hands.
STEP TWO: Dip it in water.
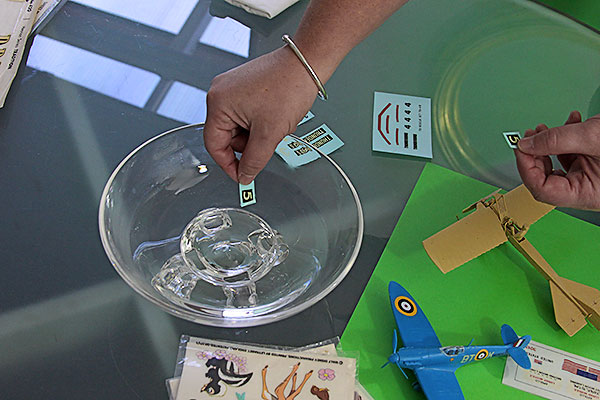
Floating the transfer face up on top of the water usually works best. Cold water should do, but warm water is preferable; in hard water areas, still bottled water might be even better — but goodness knows what else is in those bottles.
STEP THREE: Soak the transfer.
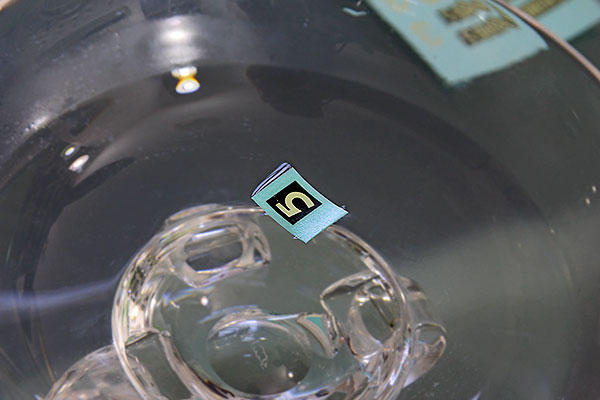
Leave the transfer for about a minute. You should be able to see when the paper is thoroughly soaked, by the slight darkening of colour.
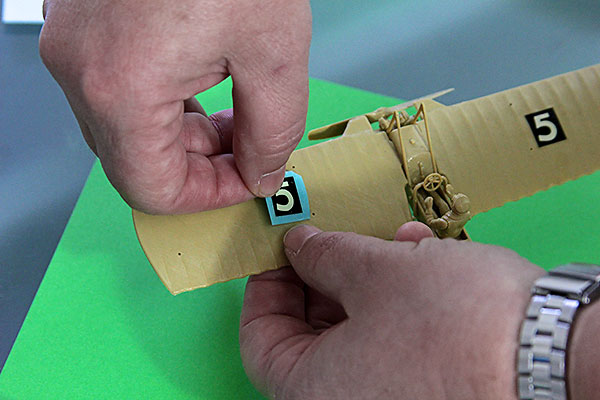
STEP FOUR: Place the transfer in position.
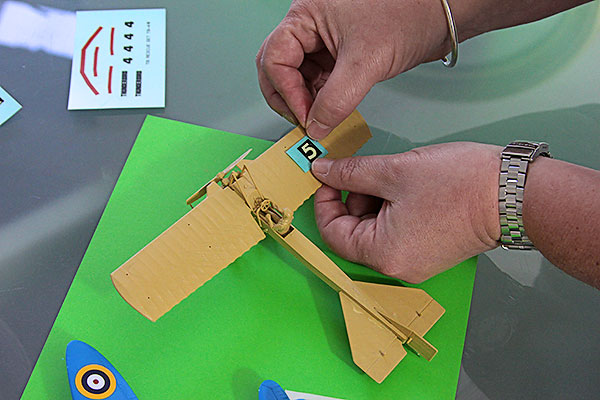
Before placing it, ensure the recipient surface is clean & dry. Accuracy, while desirable, is not absolutely essential for placing at this stage, since there will be an opportunity to correct the position later. Try to get as close as possible, though!
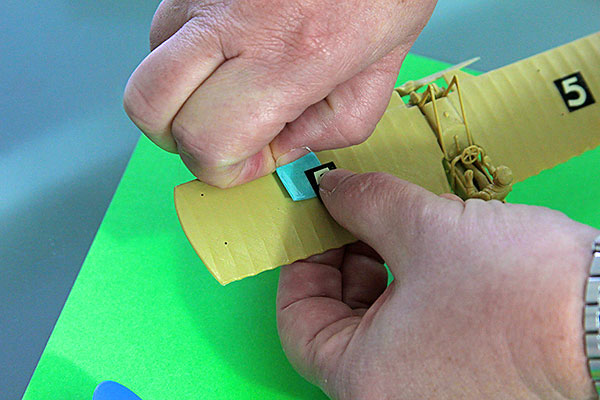
STEP FIVE: Slide away the carrier sheet.
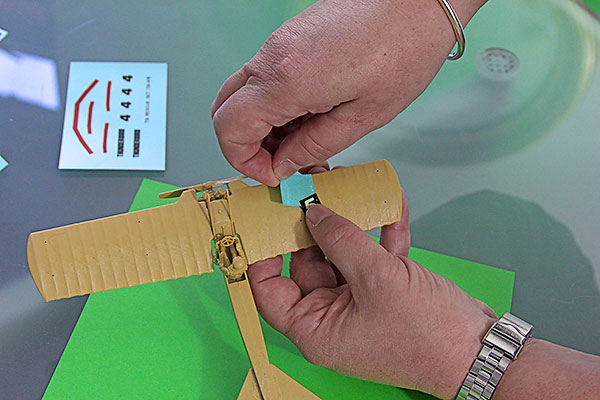
Holding the transfer in place, grip the edge of the carrier paper & pull it out from underneath the transfer. If it has been properly soaked, it should come away easily. In some cases it might be advisable to slide the transfer some of the way off the carrier paper BEFORE placing it in position, so that part of the transfer extends over the edge of the carrier paper. This makes it easier to hold the transfer in place by the jutting portion of transfer, while the rest of the carrier paper is removed.
STEP SIX: Adjust.
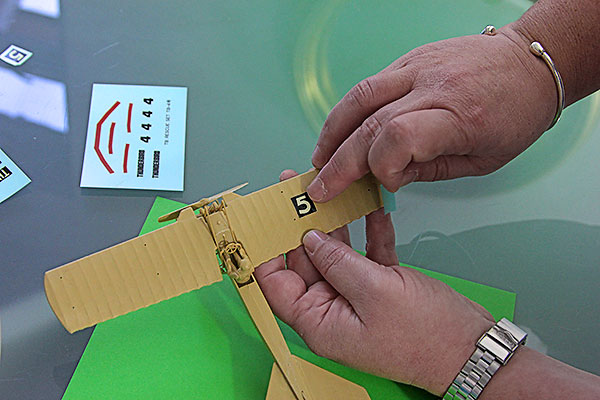
If the transfer isn't perfectly in position, now is the time to adjust it. Needless to say, this must be done very carefully to avoid tearing, or folding the transfer over itself. You want to avoid creases or bubbles. For safety, make sure everything is moist, including the tips of the fingers (or whatever tool is to be used).
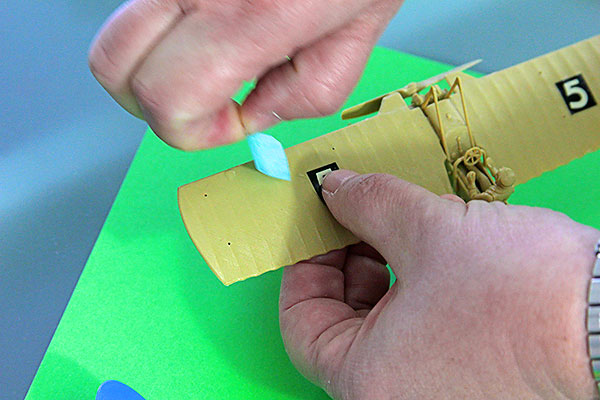
STEP SEVEN: Dry.
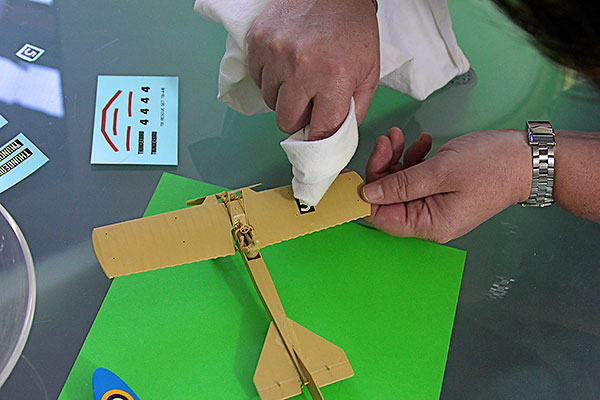
When in position, there may be air bubbles under the transfer. These can be chased away from the centre to the edges; when they get there, they will disappear. You can use a finger or a dry cloth to accomplish this magic trick. The transfer & the wet surface must be dried off, preferably with a clean, dry cloth. Do not wipe the transfer with the cloth, because this could disturb its position; instead, just dab it gently.
STEP EIGHT: Repeat with other transfers.
So that's: soak the transfer…
STEP NINE: Position.
…Place the transfer on the recipient surface…
STEP TEN: Remove the carrier paper.
…Slide away the paper from underneath the transfer…
STEP ELEVEN: Zip.
…Whoosh! It's easier after you've done it the first time (for which reason, if you've never tried this before, it would be advisable to use a spare transfer for practice before attempting the main event).
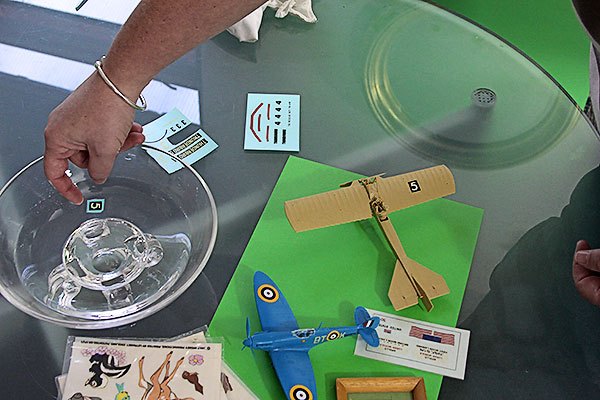
STEP TWELVE: Finished.
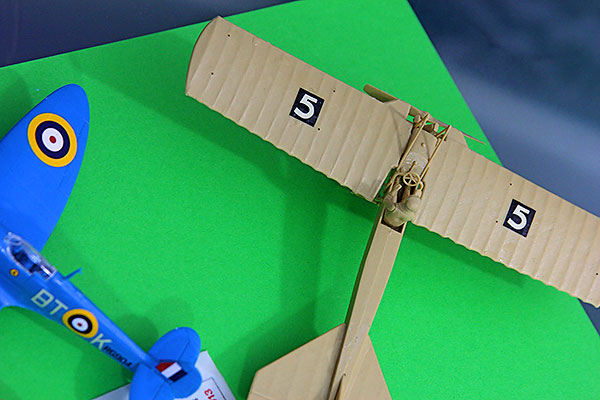
Your Thunderbird Five model kit is now complete.
Here are the links to those "What are Transfers?" article pages again in full:
- "What are Transfers?" (Main Page) ↑
- Temporary Tattoos, including "How to Apply a Vintage 1960s Temporary Tattoo" →
- How to Apply a Waterslide Model Kit Transfer (this page; see above ↑)
- Waterslide Transfers Applied to Drinking Glasses; plus Golly Transfers →
- The Letraset Type Lettering System →
- How to Apply Vintage 1959 Letraset Waterslide Lettering →
- Letraset's dry rub-down "Instant Lettering" →
- Heat Transfers, including "How to Apply a Vintage 1970s Iron-On Transfer" →
- How to Apply Letraset Dry Rub-Down Transfers →
- How Dry Rub-Down Transfers Work →
- Topps Rub-Offs, Hasbro Rub-Ons, & Trans-Action →
- Some Lovely Décalcomanies →
- How to Apply a Sticker (& other Sticker treats) →
- Stick'N'Lift →